Overview of React Gomoku
by John Vincent
Posted on August 27, 2020
Gomoku
Gomoku is a responsive, Progressive Web application version of the popular Gomoku game built using React.
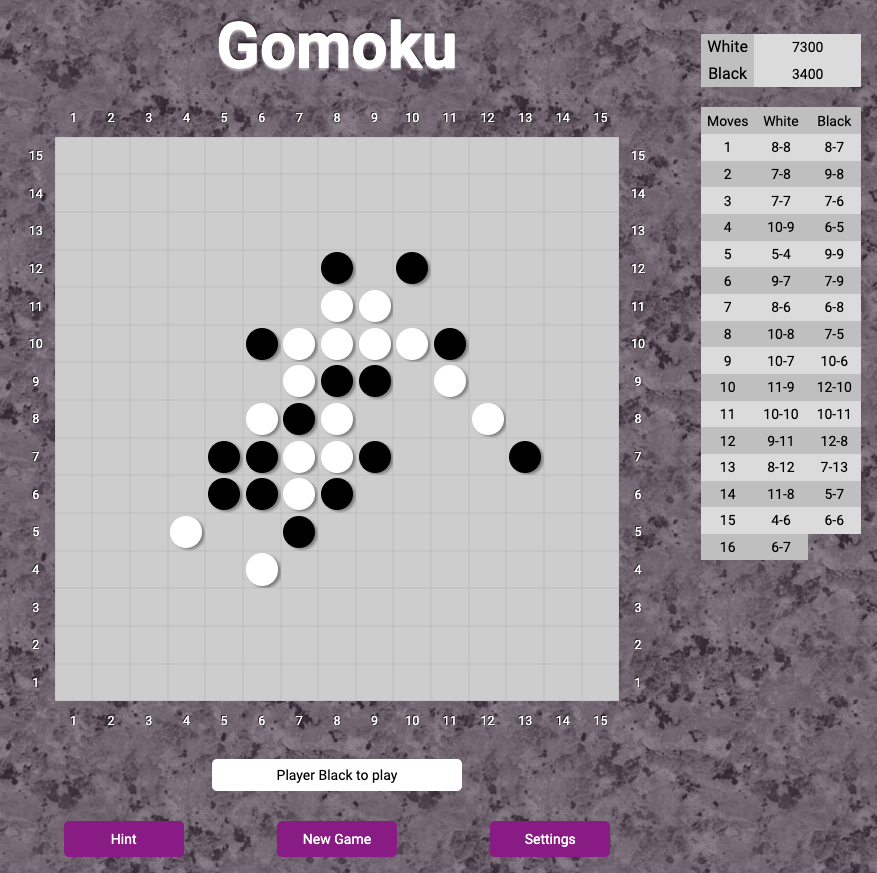
Gomoku, also called Five in a Row, is an abstract strategy board game. Players alternate turns to place a stone of their color on an empty square. The winner is the first player to form an unbroken chain of five stones horizontally, vertically, or diagonally.
Live Deployment
Technical
Spring Boot Microservice and Java as the services server.
-
Gomoku is fully responsive, adapting for mobile, table and desktop viewports.
-
Gomoku resources are served from Nginx Server
-
Gomoku is fully unit tested on the front and server-side. For React testing, Jest has been used.
-
Gomoku is deployed to an Ubuntu droplet at Digital Ocean and kept running using PM2
-
All client and server communications are performed using https.
Client
Server
Production Deployment
Deployment Overview
For extensive discussions regarding www.johnvincent.io, please see Overview of johnvincent.io website
Update
Update the OS, please see Maintaining Ubuntu Droplet
Favicons
For details, see Favicons
Made favicons as usual.
<link rel="apple-touch-icon" sizes="180x180" href="<%= htmlWebpackPlugin.options.HOME_URL %>/apple-touch-icon.png">
<link rel="icon" type="image/png" sizes="32x32" href="<%= htmlWebpackPlugin.options.HOME_URL %>/favicon-32x32.png">
<link rel="icon" type="image/png" sizes="16x16" href="<%= htmlWebpackPlugin.options.HOME_URL %>/favicon-16x16.png">
<link rel="manifest" href="<%= htmlWebpackPlugin.options.HOME_URL %>/app-manifest.json">
<link rel="mask-icon" href="<%= htmlWebpackPlugin.options.HOME_URL %>/safari-pinned-tab.svg" color="#5bbad5">
<meta name="msapplication-TileColor" content="#000000">
<meta name="msapplication-config" content="<%= htmlWebpackPlugin.options.HOME_URL %>/browserconfig.xml">
<meta name="theme-color" content="#ffffff">
Notice using HOME_URL from the environment.
app-manifest.json
Notice the subfolder
{
    "name": "Gomoku",
    "short_name": "Gomoku",
    "icons": [
        {
            "src": "/android-chrome-192x192.png",
            "sizes": "192x192",
            "type": "image/png"
        },
        {
            "src": "/android-chrome-512x512.png",
            "sizes": "512x512",
            "type": "image/png"
        }
    ],
    "theme_color": "#ffffff",
    "background_color": "#ffffff",
		"display": "standalone",
		"start_url": "index.html",
		"orientation": "portrait"
}
browserconfig.xml
Notice the subfolder
<?xml version="1.0" encoding="utf-8"?>
<browserconfig>
    <msapplication>
        <tile>
            <square150x150logo src="/mstile-150x150.png"/>
            <TileColor>#000000</TileColor>
        </tile>
    </msapplication>
</browserconfig>
Create .env files
Development
Create .env
NODE_ENV=development

HOME_URL=http://localhost:9432

SERVER_APIS_URL=http://localhost:9415

...
Production
Create /save-env/gomoku-app/client.env
NODE_ENV=production

HOME_URL=https://www.gomoku.johnvincent.io

SERVER_APIS_URL=https://www.gomoku.johnvincent.io

...
Create /save-env/gomoku-app/gomoku-server.json
{
	"apps":[
	{
			"name":"gomoku-server",
			"cwd":".",
			"script":"/usr/bin/java",
			"args":[
					"-jar",
					"/var/www/gomoku/server/gomoku-server.jar"
			],
			"watch":[
					"/var/www/gomoku/server/gomoku-server.jar"
			],
			"node_args":[],
			"log_date_format":"YYYY-MM-DD HH:mm Z",
			"exec_interpreter":"",
			"exec_mode":"fork"
	 }
 ]
}
Add Subdomain
Add subdomain, please see Configuring Google Domains
Add
Type: A
TTL: 1h
Data: 104.236.194.244
for each of
www.gomoku
gomoku
Verify subdomains
dig www.gomoku.johnvincent.io
dig gomoku.johnvincent.io
Configure HTTP Nginx
For details, please see Configure non-SSL Nginx
cd /var/www
sudo mkdir -p gomoku/html/.well-known
Create index.html
sudo vi /var/www/gomoku/html/index.html
<html>
    <head>
        <title>Welcome to gomoku!</title>
    </head>
    <body>
        <h1>Success! The server block is working!</h1>
    </body>
</html>
Permissions
sudo chown -R jv:jv /var/www/gomoku/html
cd /var/www/gomoku/html
find . -type d -print0 | xargs -0 chmod 0755
find . -type f -print0 | xargs -0 chmod 0644
Server block
sudo vi /etc/nginx/sites-available/http/gomoku
server {
  listen 80;
  listen [::]:80;

  server_name gomoku.johnvincent.io www.gomoku.johnvincent.io;
  root /var/www/gomoku/html;
  index index.html;

  location / {
    try_files $uri $uri/ =404;
  }
  location ~ /.well-known {
    allow all;
  }
}
Enable Server Block
Add to bin/enable-http and bin/enable-https
enable-http
Restart Nginx
nginx-restart
Test from browser
http://www.gomoku.johnvincent.io
http://gomoku.johnvincent.io
SSL Certificates
sudo letsencrypt certonly -a webroot --webroot-path=/var/www/gomoku/html -d gomoku.johnvincent.io -d www.gomoku.johnvincent.io
Create
sudo vi /etc/nginx/snippets/ssl-gomoku-johnvincent.io.conf
ssl_certificate /etc/letsencrypt/live/gomoku.johnvincent.io/fullchain.pem;
ssl_certificate_key /etc/letsencrypt/live/gomoku.johnvincent.io/privkey.pem;
Configure HTTPS Nginx
For details, please see Configure SSL Nginx
cd /etc/nginx/sites-available/https
sudo vi gomoku
server {
    listen 80;
    listen [::]:80;
  	server_name gomoku.johnvincent.io www.gomoku.johnvincent.io;
    return 301 https://www.gomoku.johnvincent.io$request_uri;
}

server {
    listen 443 ssl http2;
    listen [::]:443 ssl http2;
		include snippets/ssl-gomoku-johnvincent.io.conf;
    include snippets/ssl-params.conf;

    server_name gomoku.johnvincent.io;
    return 301 https://www.gomoku.johnvincent.io$request_uri;
}

server {
    listen 443 ssl http2;
    listen [::]:443 ssl http2;
    include snippets/ssl-gomoku-johnvincent.io.conf;
    include snippets/ssl-params.conf;
    include h5bp/basic.conf;

		root /var/www/gomoku/html;
    index index.html;

    server_name www.gomoku.johnvincent.io;

   location / {
      try_files $uri /index.html;
    }
		location /gomoku/rest {
			proxy_pass http://localhost:9415/gomoku/rest;
		}
    location = /analytics.js {
        proxy_pass https://www.google-analytics.com;
        expires 31536000s;
        proxy_set_header Pragma "public";
        proxy_set_header Cache-Control "max-age=31536000, public";
    }
    location /junk {
        try_files $uri =503;
    }
		location ~*  \.(svg|jpg|jpeg|png|gif|ico|css|js|pdf)$ {
      add_header Cache-Control "max-age=31536000";
      access_log off;
  #   expires 30d;
    }
}
Notice the proxy to the Spring Boot Microservice
location /gomoku/rest {
	proxy_pass http://localhost:9415/gomoku/rest;
}
Enable Https
cd bin
./enable-https
Test from Browser
http://www.gomoku.johnvincent.io
http://gomoku.johnvincent.io

https://www.gomoku.johnvincent.io
https://gomoku.johnvincent.io
All show the simple index.html file that was created earlier.
Test SSL Certificates
Ensure all scores are A+
https://www.ssllabs.com/ssltest/analyze.html?d=gomoku.johnvincent.io
https://www.ssllabs.com/ssltest/analyze.html?d=www.gomoku.johnvincent.io
Install and Configure Java
Update the system
sudo apt-get update && apt-get upgrade
install the default JDK
sudo apt-get install default-jdk
Check java version
java -version
Create Server Directory
cd /var/www
sudo mkdir -p gomoku/server
Permissions
sudo chown -R jv:jv /var/www/gomoku/server
cd /var/www/gomoku/server
find . -type d -print0 | xargs -0 chmod 0755
find . -type f -print0 | xargs -0 chmod 0644
PM2
Add to handle-pm2
echo "Check status of gomoku-server"
pm2 describe gomoku-server > /dev/null
RUNNING=$?
if [ "${RUNNING}" -ne 0 ]; then
  echo "Adding gomoku-server to PM2"
  cd /var/www/gomoku/server
	pm2 start gomoku-server.json --name "gomoku-server"
else
  echo "Restarting gomoku-server"
  pm2 restart gomoku-server
fi;
SSH to Github
For details, please see SSH to Github
Deployment Script
bin/deploy-gomoku-app
#!/bin/sh
#
#  script to get, build and deploy Gomoku to nginx
#
# setup ssh to github
#
echo "setup ssh to github"
eval "$(ssh-agent)"
ssh-add -k ~/.ssh/id_github
#
cd
cd tmp
#
CLONES_CLIENT_DIR="/home/jv/clones/gomoku-client"
CLONES_SERVER_DIR="/home/jv/clones/gomoku-server"
DOCROOT_DIR="/var/www/gomoku/html"
SERVER_ROOT_DIR="/var/www/gomoku/server"
SAVE_ENV_DIR="/home/jv/save-env"

#
#  Make Gomoku Client
#
echo "Removing clones directory $CLONES_CLIENT_DIR"
rm -rf $CLONES_CLIENT_DIR

echo "Creating clones directory $CLONES_CLIENT_DIR"
mkdir $CLONES_CLIENT_DIR
cd $CLONES_CLIENT_DIR

echo "Git clone desired repositories to $CLONES_CLIENT_DIR"
git clone git@github.com:johnvincentio/gomoku-client $CLONES_CLIENT_DIR

echo "Copy Gomoku client .env file to $CLONES_CLIENT_DIR"
cp -r $SAVE_ENV_DIR/gomoku-app/client.env $CLONES_CLIENT_DIR/.env

echo "Make the Gomoku client"
cd $CLONES_CLIENT_DIR

echo "Npm install the Gomoku client $CLONES_CLIENT_DIR"
npm install
#
echo "Make Gomoku client production"
npm run production
#
echo "Minify $CLONES_CLIENT_DIR/dist/index.html"
cp dist/index.html dist/index.work
html-minifier dist/index.work --remove-comments --output dist/index.html
rm dist/index.work

#
#  Make Gomoku Server
#

echo "Removing clones directory $CLONES_SERVER_DIR"
rm -rf $CLONES_SERVER_DIR

echo "Creating clones directory $CLONES_SERVER_DIR"
mkdir $CLONES_SERVER_DIR
cd $CLONES_SERVER_DIR

echo "Git clone desired repositories to $CLONES_SERVER_DIR"
git clone git@github.com:johnvincentio/gomoku-server $CLONES_SERVER_DIR

echo "Copy Gomoku server .json file to $CLONES_SERVER_DIR"
cp -r $SAVE_ENV_DIR/gomoku-app/gomoku-server.json $CLONES_SERVER_DIR

#
# Copy Gomoku Client to Nginx
#

#
# Delete files in nginx docroot
#
echo "Delete files in Nginx Docroot $DOCROOT_DIR"
rm -rf $DOCROOT_DIR/*

#
# Copy client files to nginx
#
echo "Copy client files to $DOCROOT_DIR"
cp -r $CLONES_CLIENT_DIR/dist/* $DOCROOT_DIR

#
# set permissions
#
echo "Setting permissions on $DOCROOT_DIR"
sudo chown -R jv:jv $DOCROOT_DIR
sudo chmod 0755 $DOCROOT_DIR
find $DOCROOT_DIR -type d -print0 | xargs -0 chmod 0755 # For directories
find $DOCROOT_DIR -type f -print0 | xargs -0 chmod 0644 # For files

#
# Copy Gomoku Server to Server
#

#
# Delete files in nginx server-root
#
echo "Delete files in Nginx server root $SERVER_ROOT_DIR"
rm -rf $SERVER_ROOT_DIR/*

#
# Copy files to server root
#
echo "Copy files to server root"
cp $CLONES_SERVER_DIR/gomoku-server.jar $SERVER_ROOT_DIR
cp $CLONES_SERVER_DIR/gomoku-server.json $SERVER_ROOT_DIR

#
# set permissions
#
echo "Setting permissions on $SERVER_ROOT_DIR"
sudo chown -R jv:jv $SERVER_ROOT_DIR
sudo chmod 0755 $SERVER_ROOT_DIR
find $SERVER_ROOT_DIR -type d -print0 | xargs -0 chmod 0755 # For directories
find $SERVER_ROOT_DIR -type f -print0 | xargs -0 chmod 0644 # For files
#

echo "Handle PM2"
handle-pm2
#
echo "Restarting Nginx"
nginx-restart
#
echo "Mongo Status"
mongo-status
#
echo "Completed"
Spring Microservice
Notice the copy to /var/www/gomoku/server of
gomoku-server.jargomoku-server.json
Deploy
cd
cd bin
./deploy-gomoku-app
Test
https://www.gomoku.johnvincent.io/
Production Status
To show the state of all services
pm2 list
To show the state of the microservice
pm2 show gomoku-server
Notice the logs may be found at
/home/jv/.pm2/logs
To monitor the microservice
pm2 monit gomoku-server
Development
Gomoku Client is a browser based client.
Gomoku Server is a Spring Boot Microservice that provides the AI (artificial intelligence).
Build Spring Boot Microservice
Dependency: Spring Web
Start eclipse-jee from /Users/jv/Desktop/MyDevelopment/github/website/gomoku-server
Import Project from /Users/jv/Desktop/MyDevelopment/github/website/gomoku-server
Server Port
Edit application.properties and add server.port=9415
Execute the service
Create /Users/jv/Desktop/MyDevelopment/github/website/gomoku/gomoku-server/gomoku-server/execute
echo " "
echo "Run the Spring Boot server"
echo " "
#
./mvnw spring-boot:run
Execute the service
cd /Users/jv/Desktop/MyDevelopment/github/website/gomoku/gomoku-server/gomoku-server

./execute
Test the service
http://localhost:9415/gomoku/rest/move/scores
Build Microservice as an executable Jar
Create /Users/jv/Desktop/MyDevelopment/github/website/gomoku/gomoku-server/gomoku-server/create-package
#!/bin/sh
#
# script to create Jar
#
#
echo "Maven clean and make the package"
./mvnw clean package

echo "Save Jar"
cp target/gomoku-server-0.0.1-SNAPSHOT.jar ../gomoku-server.jar

echo "Completed"
Run the script create-package
and
java -jar gomoku-server.jar
Test using
http://localhost:9415/gomoku/rest/move/scores
Other
The proxy of the /gomoku/rest to a microservice http://localhost:9415/gomoku/rest will cause CORS problems.
Spring Boot has a built-in solution.
	@CrossOrigin(origins = "*", allowedHeaders = "*")
	@GetMapping("/gomoku/rest/....")
	public List<Solution> findSolution(@RequestParam(value = "id", defaultValue = "0") int id) {
		StringBuffer sb = getFileContents(id);
		List<Solution> list = Utils.JSONArraytoListObject(sb.toString());
		return list;
	}
This implementation allows all. To be more restrictive, use something like
@CrossOrigin(origins = "http://localhost:9432")
or for multiple origins
@CrossOrigin(origins = {"http://localhost:9432", "https://www.gomoku.johnvincent.io"}, allowedHeaders = "*")
Website Validation
Google Webmaster
create-sitemap
#!/bin/sh
#
OUTFILE=static/sitemap.xml
#
addFile() {
    CURFILE=$1;
    echo "\t<url>" >> $OUTFILE;
    echo "\t\t<loc>$MYHOST$CURFILE</loc>" >> $OUTFILE;
    echo "\t\t<lastmod>$DATE</lastmod>" >> $OUTFILE;
    echo "\t</url>" >> $OUTFILE;
}
#
DATE=`date +%Y-%m-%dT00:00:00+00:00`
# echo "Date $DATE"
MYHOST="https://www.gomoku.johnvincent.io"
#echo "MYHOST $MYHOST"
#
echo '<urlset xmlns:xsi="http://www.w3.org/2001/XMLSchema-instance" ' > $OUTFILE
echo '\txmlns="http://www.sitemaps.org/schemas/sitemap/0.9" ' >> $OUTFILE
echo '\txsi:schemaLocation="http://www.sitemaps.org/schemas/sitemap/0.9 ' >> $OUTFILE
echo '\thttp://www.sitemaps.org/schemas/sitemap/0.9/sitemap.xsd">' >> $OUTFILE
#
addFile '/'
#
echo '</urlset>' >> $OUTFILE
Create sitemap.xml
./create-sitemap
create-robots
#!/bin/sh
#
OUTFILE=static/robots.txt
#
MYHOST="https://www.gomoku.johnvincent.io"
#echo "MYHOST $MYHOST"
#
echo "User-agent: *" > $OUTFILE
echo "Allow: /" >> $OUTFILE
echo "Sitemap: $MYHOST/sitemap.xml" >> $OUTFILE
echo "Host: $MYHOST" >> $OUTFILE
#
cat $OUTFILE
Create robots.txt
./create-robots
Add to webpack.config.js
new CopyWebpackPlugin([{ from: 'static/sitemap.xml', to: '.' }], {
	debug: copyWebpackPluginOptions
}),
new CopyWebpackPlugin([{ from: 'static/robots.txt', to: '.' }], {
	debug: copyWebpackPluginOptions
}),
Start Google Webmaster Tools
- Add a Property
- Domain or URL prefix
- Choose URL prefix as adding a subdomain.
- You would choose Domain for a new domain.
- Enter URL
adds property.
- Select property: https://www.gomoku.johnvincent.io
- Settings (lower left nav)
Under: Property settings:
-
Select Ownership verification.
-
Select: HTML file
- Download the file and copy to
static
- Download the file and copy to
Add to webpack.config.js
new CopyWebpackPlugin([{ from: 'static/google9104b904281bf3a3.html', to: '.' }], {
	debug: copyWebpackPluginOptions
}),
- Select: HTML tag
- Download the file and copy to
static
- Download the file and copy to
Add to index.hbs
<meta name="google-site-verification" content="<%= htmlWebpackPlugin.options.GOOGLE_SITE_VERIFICATION %>" />
Add to .env
#
# Google site verification
#
GOOGLE_SITE_VERIFICATION=the-html-tag-goes-here
Also change:
- Production
client.env - shells:
client.env
Deploy Gomoku with the updated code.
Verify:
- https://www.gomoku.johnvincent.io/sitemap.xml
- https://www.gomoku.johnvincent.io/robots.txt
- https://www.gomoku.johnvincent.io/google9104b904281bf3a3.html
google-site-verificationmeta tag is in the Html.
- Select property: https://www.gomoku.johnvincent.io
- Settings
- HTML File
- Verify
- HTML Tag
- Verify
Verification is now complete.
- Select property: https://www.gomoku.johnvincent.io
- Sitemaps
Add a sitemap
- Add a new sitemap
Google Analytics
Start Google Analytics
- Admin
- Create Account
Account Setup
- Name: Gomoku
- Next
What do you want to measure
- Web
- Next
Property Details
- Website Name: Gomoku
- Website URL: https://www.gomoku.johnvincent.io
- Industry category: Games
- Reporting Zone: US New York
Create
Note the Tracking Id.
Add code to index.hbs
	<!-- Global site tag (gtag.js) - Google Analytics -->
	<script async src="https://www.googletagmanager.com/gtag/js?id=<%= htmlWebpackPlugin.options.GOOGLE_ANALYTICS_UA %>"></script>
	<script>
		window.dataLayer = window.dataLayer || [];
		function gtag(){dataLayer.push(arguments);}
		gtag('js', new Date());

		gtag('config', '<%= htmlWebpackPlugin.options.GOOGLE_ANALYTICS_UA %>');
	</script>
	<!-- End Google Analytics -->
Add to .env
#
# Google Analytics
#
GOOGLE_ANALYTICS_UA=google-tracking-id
Check webpack.config.js, index.hbs, .env and transform.js
- Ensure alignment and correct usage of ENV variables.
Also change:
- Production
client.env - shells:
client.env
Deploy Gomoku with the updated code.
Access https://www.gomoku.johnvincent.io from:
- Browsers
- Android
- iOS
From Google Analytics
- Select: Gomoku
- All Web Site Data
Scroll down to Active Users Right Now. There should now be some traffic.
See Real-time report for more details.
Extras
To Dump Game to a new tab
- Settings
- Click on Settings
- Enter 'd'
To Export Game to a new tab
- Settings
- Click on Settings
- Enter 'e'
To Import Game
- Settings
- Click on Settings
- Enter 'i'
Drag and drop your .gomoku file into the area below Settings.
For Diagnostics
- Settings
- Click on Settings
- Enter 'z'
Java Swing App
The Java Swing App uses the same code as the Spring Boot Server microservice.
Script File
/Users/jv/Desktop/MyDevelopment/github/website/gomoku/gomoku-server/gomoku-server/gomoku.command
#!/bin/sh
#
# script to run java app Gomoku
#
PARAMS="$*"
echo "PARAMS are $PARAMS"
#
DEV_HOME=/Users/jv/Desktop/MyDevelopment/github/website/gomoku/gomoku-server/gomoku-server
#
cd $DEV_HOME
#
MYCP=$DEV_HOME/target/classes:/Users/jv/.m2/repository/com/fasterxml/jackson/core/jackson-core/2.10.3/jackson-core-2.10.3.jar
#
MY_FILE=$PARAMS
#
java -cp $MYCP -Xdock:name="Gomoku" io.johnvincent.gomoku.gui.AppGUI $MY_FILE
#
Create Symbolic Link
ln -s /Users/jv/Desktop/MyDevelopment/github/website/gomoku/gomoku-server/gomoku-server/gomoku.command /Users/jv/Desktop/MyDevelopment/github/repo_shell_scripts/mac/unix-scripts/bin/java-gomoku
Save Gomoku as a Mac App
Execute from Finder
- Go, Applications
- Execute: Automator (or Automator.app)
Select
- Quick Action, or
- Application
and then select Choose
From the middle pane, double click Run Shell Script
Shell: /bin/bash Pass input: as arguments
/Users/jv/Desktop/MyDevelopment/github/repo_shell_scripts/mac/unix-scripts/bin/java-gomoku $1
To save:
- File, Save:
- Save as:
java-gomoku - Where: Applications
saves java-gomoku.app in Applications.
Make Gomoku default app for *.gomoku
In Finder
-
select folder
cd /Users/jv/Desktop/MyDevelopment/github/website/gomoku/gomoku-server/gomoku-server/src/test/resources/junit-tests/games/b -
select any
.gomokufile -
right click, Get Info
-
Open with:
- Select:
java-gomoku.app - Select: Change All
- Select:
Start Gomoku with Game Imported
java-gomoku file.gomoku
where:
file.gomokuis an optional parameter, the filename of a saved Gomoku game.
For example:
java-gomoku /Users/jv/Desktop/MyDevelopment/github/website/gomoku/gomoku-server/gomoku-server/src/test/resources/junit-tests/games/b/1.gomoku
Verify
cd /Users/jv/Desktop/MyDevelopment/github/website/gomoku/gomoku-server/gomoku-server
./gomoku.command src/test/resources/junit-tests/games/b/1.gomoku
and
cd /Users/jv/Desktop/MyDevelopment/github/website/gomoku/gomoku-server/gomoku-server
/Users/jv/Desktop/MyDevelopment/github/repo_shell_scripts/mac/unix-scripts/bin/java-gomoku src/test/resources/junit-tests/games/b/1.gomoku
and
cd /Users/jv/Desktop/MyDevelopment/github/website/gomoku/gomoku-server/gomoku-server
open -a gomoku.app --args src/test/resources/junit-tests/games/b/1.gomoku